“A picture speaks a thousand words, but a picture with killer typography starts entire conversations.” – GifHow
Ready to elevate your Instagram game and make your quotes truly sing? Forget flat, static text – it’s time to master the art of curved typography in Canva! This step-by-step guide will show you how to bend your words like a pro, creating visually engaging posts that grab attention and spark interaction.
Step-by-Step: Bending Text Like a Pro

1. Open Canva & Set Your Stage
- Create Design → Social Media → Instagram Post.
- Drag your photo in, right-click → Set image as background. Boom. Instant mood board.
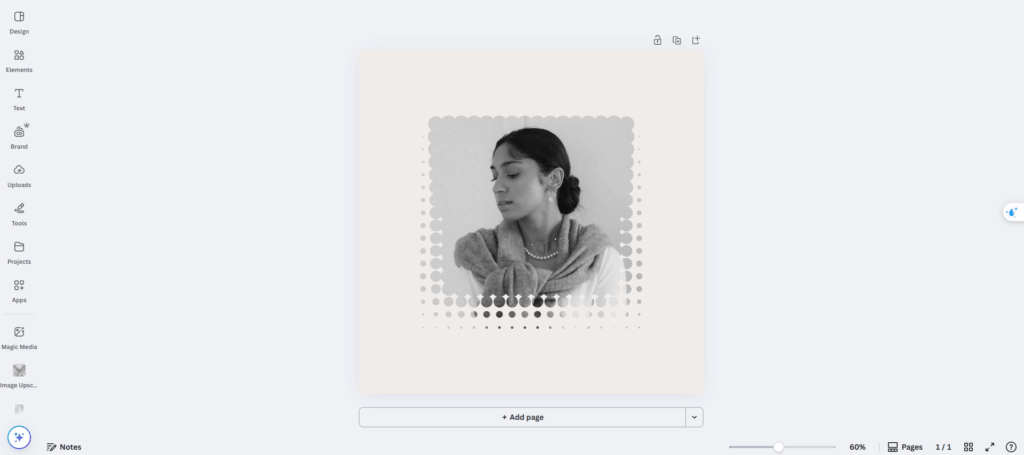
2. Split Your Quote for Maximum Impact
- Hit T on your keyboard to pop a text box in the center.
- Type the First Half of your quote. Center-align it, then drag the box above your subject’s head.
- Create a second text box for the Second Half and park it near the subject’s feet.
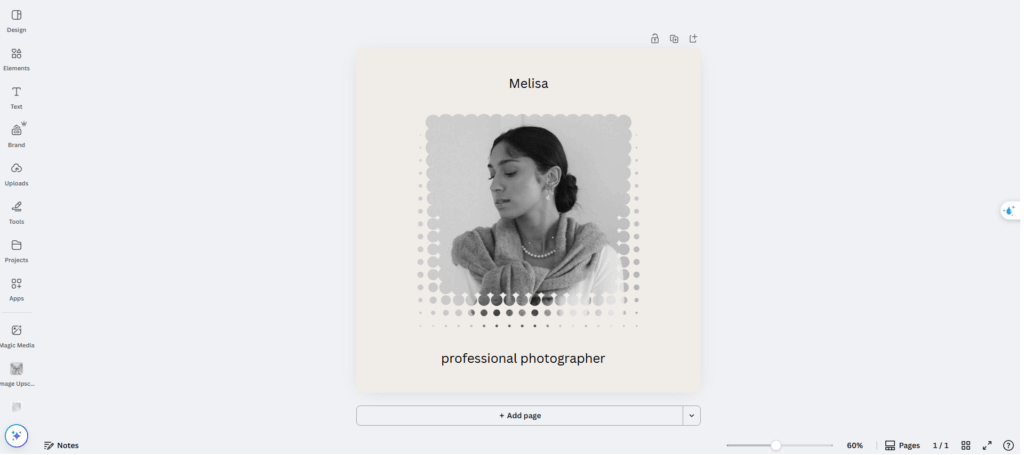
✨ Gif.How Hack: Keep everything perfectly aligned using Canva’s handy pink snap lines that appear as you drag elements.
3. Brand Your Type with Color
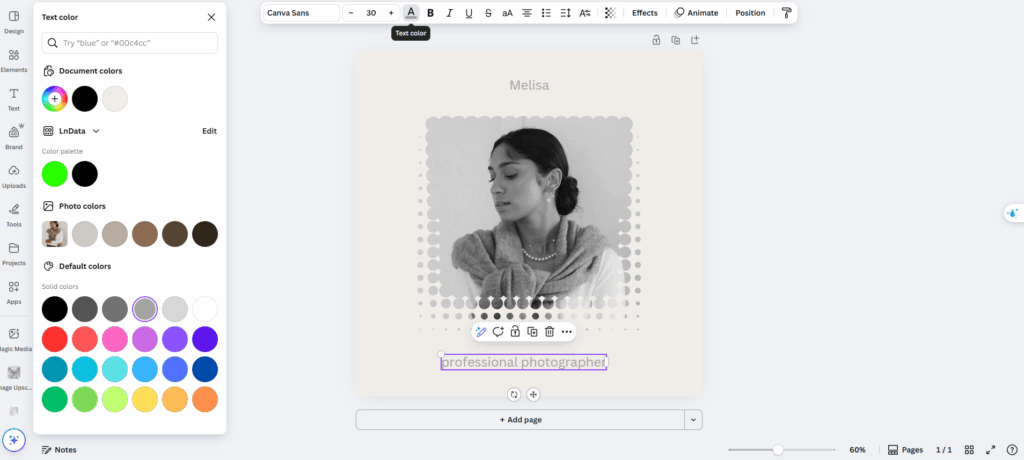
- Select the text → Text Color in the top bar.
- Under Photo Colors, choose the color you think is suitable you can take the color from the image to feel integrated.
4. It’s Curving Time!
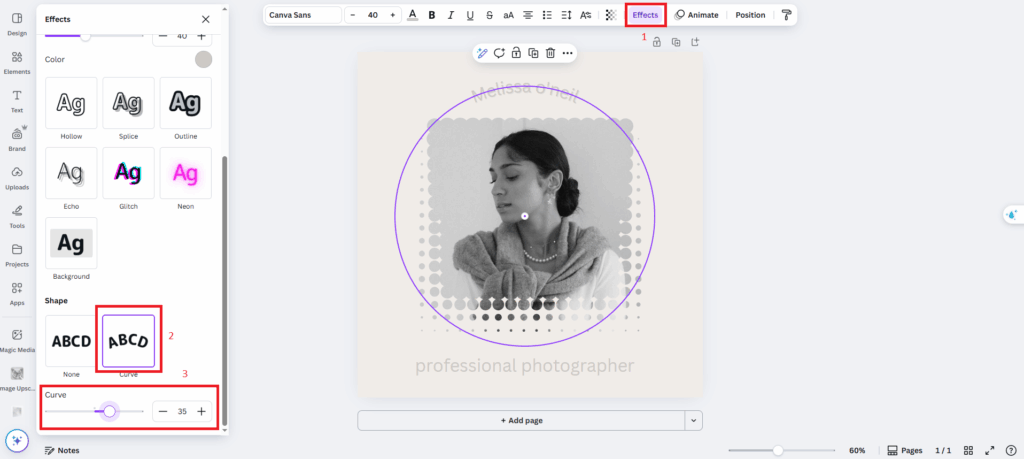
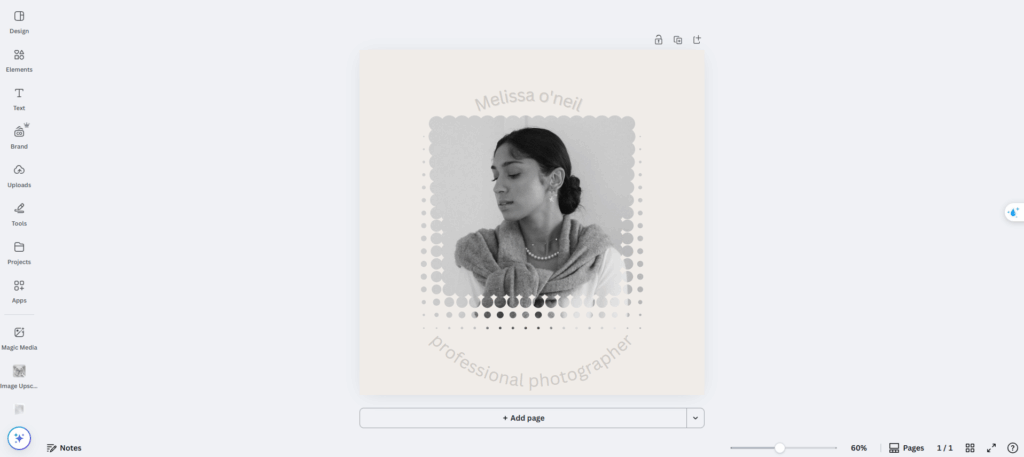
- Select the top text box → Effects → Shape → Curve.
- Dial the slider or type a value—start around 35.
- Add a guide circle (Elements → Shapes). Turn fill off, keep a thin outline. Resize the circle so it hugs your subject.
- Match the text curve to the circle’s edge for pixel-level accuracy.
5. Mirror the Curve for Line 2
- Remember the magic number 35? Click on the bottom text box and type -35. Same radius, opposite direction. Instant symmetry achieved. You can further adjust the font size to fit the image, this time it’s up to your eyes
6. Fine-Tune Like a Typo-Ninja
- Shrink or enlarge the font so words don’t spill off-screen.
- Select Spacing in the top bar:
- Letter spacing widens the arc without changing size.
- Line spacing keeps multi-line quotes tidy.
- Any tweak may nudge the alignment—slide back into Curve and bump ±1 until it snaps back to the guide circle.
7. Optional Style Boosters for Extra Flair:
- Subtle Outline: Adding a thin outline to your text (using the “Effects” tab) can make it pop against busy backgrounds.
- Gentle Drop Shadow: A slight drop shadow (also in “Effects”) improves legibility without being distracting, giving your text a subtle lift.
- Animate (for Video Posts): If you’re creating an Instagram Reel or Story, head to Canva’s Animate tab. Choose a gentle animation like “Fade” so your curved text gracefully appears, adding a touch of dynamic visual interest when exported as a video.
By following these simple steps, you’ll be crafting Instagram posts with dynamic, curved typography that not only complements your visuals but also ignites conversations. So go ahead, bend those words, and watch your engagement soar!
See more Curve Text on Canva: Quick & Easy Guide for Beginners at Gif.How


